I decided that I would start making some greeting cards as I had a bunch of good quality card stock to use up and I thought some small fluid acrylic paintings might make some nice designs for blank greeting cards.
I’m not sure how financially viable it will be but does allow me also to experiment with different colours and paints. At the moment I can make them with existing materials so it is not going to cost me anything (in theory) so I will see how those go first before deciding to do any more.
I’m going to report on how my initial set of cards went and it actually went pretty well!
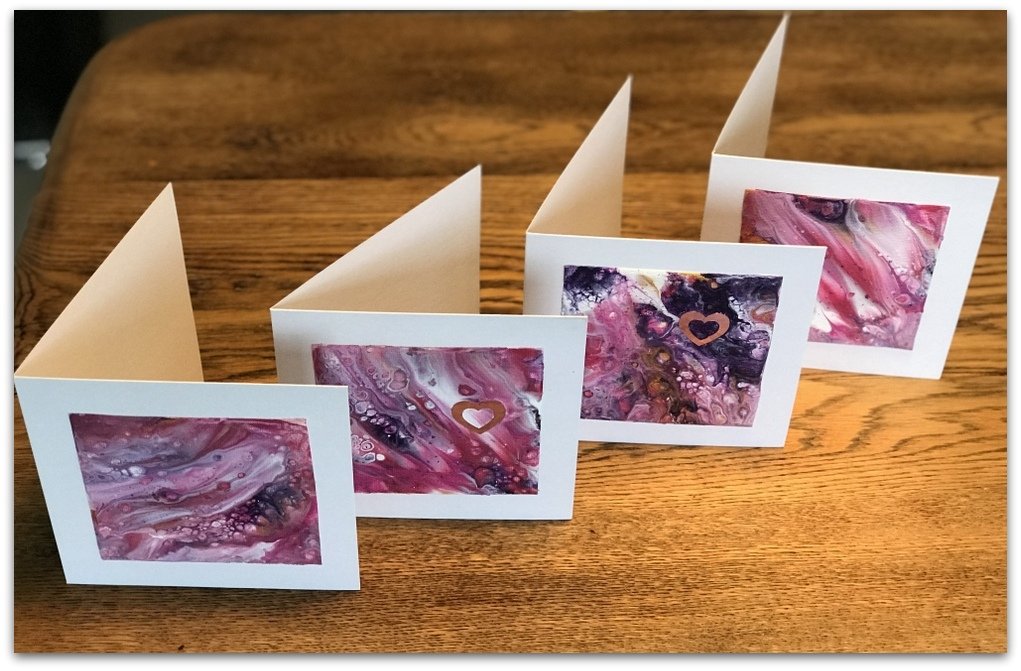
Firstly I found that I had a canvas pad of paper (well it was canvas but quite thin and in tear off sheets) which I thought would be a good thing to use. I measured the cards that I had (which were 135 x 135mm) and cut the sheets of canvas into 6 to fit within the card.
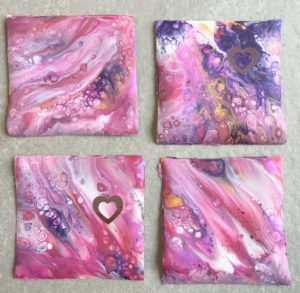
Then I got a flat foil tray (one that I had cleaned out from a ready meal so that was recycled) and made sure it was big enough to put my pieces in flat. I decided to use some pinks in my first attempt so I used an iridescent pink by Pebeo, a red/pink that I had made up, some purple that had Floetrol in and some white.
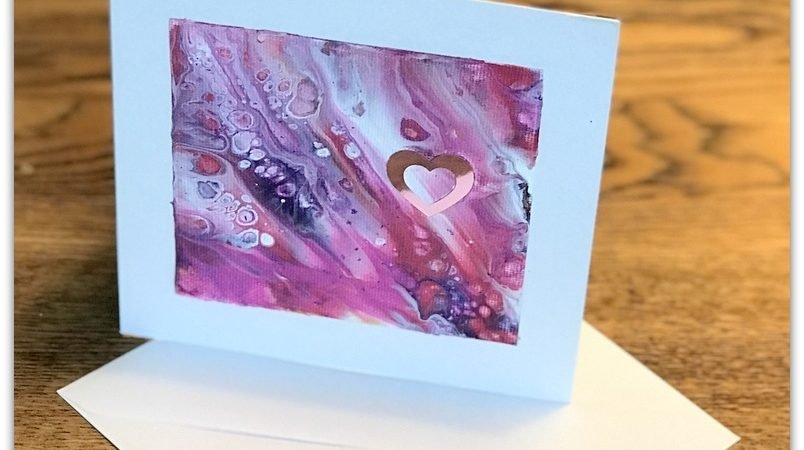
I squeezed in various amounts of these colours into the bottom of the tray, ensuring enough coverage for the squares. I then put the first square in face down, squished it a bit and then pulled it out. I sprinkled a bit of glitter on and also added a pink heart to 2 of them that I had lying around.
I continued with each sheet of canvas by adding more paint in between each dip. I only did 4 on the first occasion because as they were coming out of the paint they were curling up at the sides and I wasn’t sure if I would be able to flatten them out.
I left them to dray overnight and they were completely dry the next day. Luckily they did actually go reasonably flat when they were dry – flat enough to stick down to the card. I didn’t varnish them as they didn’t look like they needed it.
I used 3M craft spray glue
I am really happy with the finished effect and they are now for sale on my website. I will be doing more in my favourite blue and green tones when I get some more time!
Thanks for your tutorial! I usually do oil paints, but I thought that I could probably
use acrylics, too. I just didn’t even know the basics of card making. I think I might
can try this now!